Picture this: a cozy afternoon in the kitchen, the sun filtering through the window, and the delightful aroma of toasted sesame oil wafting through the air. I found myself wanting a fresh and satisfying way to embrace both flavor and health, and that’s when I stumbled upon my newest obsession—Crispy Rice Veggie Cups.

Jump to:
- Why are <strong>Crispy Rice Veggie Cups</strong> so special?
- <strong>Crispy Rice Veggie Cups Ingredients</strong>
- How to Make Crispy Rice Veggie Cups
- What to Serve with <strong>Crispy Rice Veggie Cups</strong>?
- <strong>Crispy Rice Veggie Cups</strong> Variations
- How to Store and Freeze Crispy Rice Veggie Cups
- Make Ahead Options
- Expert Tips for Crispy Rice Veggie Cups
- Crispy Rice Veggie Cups Recipe FAQs
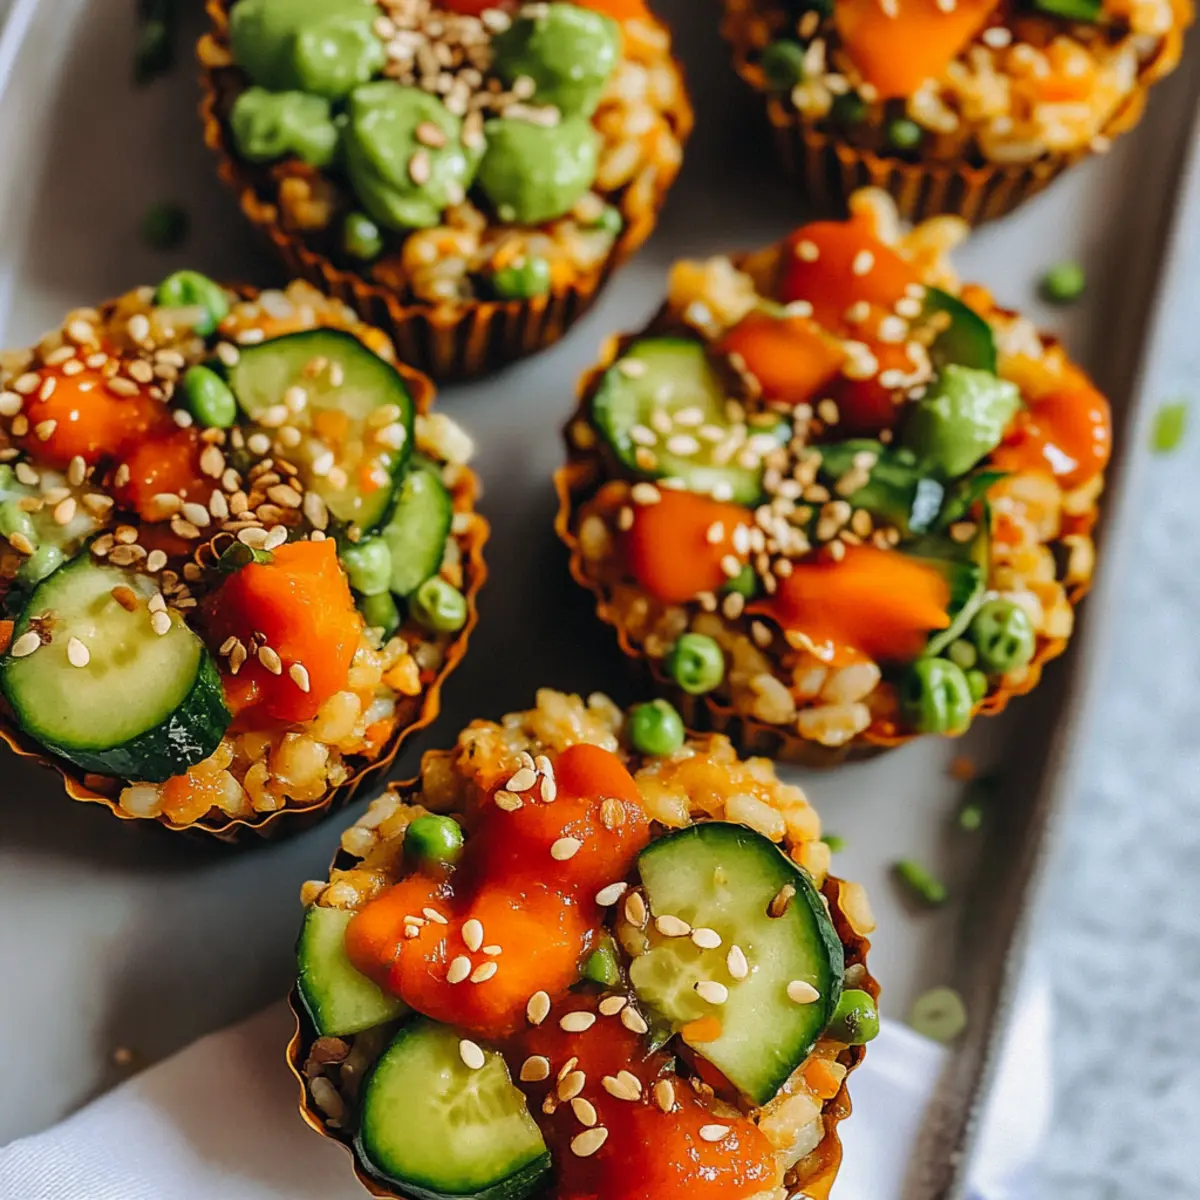
These little gems are not just a feast for the eyes but also a versatile canvas for whatever veggies and proteins you adore. Imagine perfectly baked rice cups, golden and crisp at the edges, then brimming with a savory chickpea mixture that’s equal parts satisfying and nutritious.
Whether you’re hosting a gathering or simply seeking a fun finger food for a weeknight dinner, these veggie cups deliver the perfect blend of texture and flavor without the fuss. Trust me, once you set these out, they’ll disappear faster than you can say “homemade!” Let’s dive into creating this delicious treat that’s bound to add some excitement to your cooking routine.
Why are Crispy Rice Veggie Cups so special?
Flavor Explosion: Each bite bursts with a delightful mix of savory chickpeas and fresh veggies, making them a satisfying choice for any meal.
Baked to Perfection: Enjoy the satisfying crunch of golden rice cups that hold all your favorite fillings beautifully.
Vegan & Versatile: Tailor these cups to your taste with different vegetables and proteins, making every batch a new creation!
Quick Preparation: Ready in just 40 minutes, they’re perfect for busy weeknights when you crave something wholesome.
Crowd-Pleaser: Ideal for gatherings, these fun finger foods are sure to impress friends and family alike!
Make dinner exciting with these Crispy Rice Veggie Cups, and see how they transform your mealtime!
Crispy Rice Veggie Cups Ingredients
• Discover the key components of these delightful treats!
For the Rice Cups
- Cooked sushi rice – Ensures a sticky texture that holds the cups together perfectly.
- Rice vinegar – Adds a tangy kick that enhances the flavor of the rice.
- Sesame oil – Provides a rich, nutty aroma that brings warmth to the dish.
- Pinch of salt – Elevates the overall taste, balancing the flavors beautifully.
For the Chickpea Filling
- Cooked chickpeas – Packed with protein, they offer a hearty base for the filling.
- Soy sauce – Imparts a savory depth that complements the chickpeas marvelously.
- Maple syrup (optional) – A hint of sweetness that can elevate the overall mixture.
- Rice vinegar or lime juice – The zest will brighten the filling and add freshness.
- Garlic powder (optional) – Adds a warm, aromatic flavor that pairs wonderfully.
- Chopped green onion – Introduces a crisp texture and a pop of color.
- Sesame seeds – A delightful crunch that enhances the visual and textural appeal.
For Serving (optional)
- Avocado, sliced – Creaminess that balances the flavors beautifully.
- Edamame – Adds a vibrant green color and a protein boost.
- Cucumber ribbons or grated carrot – For a refreshing crunch that elevates your veggie cups.
- Sriracha – A spicy drizzle for those who love a kick in their bites.
Embrace the joy of cooking with these Crispy Rice Veggie Cups by using the freshest ingredients tailored to your tastes!

How to Make Crispy Rice Veggie Cups
-
Preheat your oven to 400°F and lightly oil a muffin tin. This is essential for ensuring your rice cups don’t stick and allows them to crisp up beautifully.
-
Mix the cooked sushi rice with rice vinegar, 1 teaspoon of sesame oil, and a pinch of salt in a bowl. Stir until everything is evenly combined, giving the rice a nice tangy flavor.
-
Press the rice mixture firmly into each muffin cavity, shaping it into cups with slightly raised edges. This helps create the perfect vessel for your filling.
-
Bake the rice cups for 20 to 25 minutes, or until the edges turn golden brown and crispy. You’ll know they’re done when they emit a delightful aroma!
-
Combine the chickpeas, soy sauce, remaining 1 teaspoon of sesame oil, maple syrup (if using), rice vinegar or lime juice, garlic powder, green onion, and sesame seeds in a separate bowl. Mix well to coat the chickpeas with flavor.
-
Cool the rice cups slightly after baking, then carefully remove them from the muffin tin. They should come out easily, revealing their crispy, golden edges.
-
Fill each rice cup with the seasoned chickpea mixture, pressing down gently to pack them nicely. This is where all the magic happens; the filling adds flavor and nutrition!
-
Top with sliced avocado, edamame, cucumber ribbons or grated carrot, and drizzle with sriracha if desired. Serve immediately while warm for the best experience!
Optional: Add a sprinkle of fresh herbs for extra flavor and a pop of color.
Exact quantities are listed in the recipe card below.
What to Serve with Crispy Rice Veggie Cups?
Looking to create a memorable meal around your delightful veggie cups? Let’s explore some pairings that will elevate your dining experience!
-
Fresh Green Salad: The crispness of a mixed greens salad with a zesty vinaigrette adds a refreshing contrast to the rich chickpea filling.
-
Roasted Veggies: Roasted zucchini, bell peppers, or carrots bring a satisfying sweetness that beautifully complements the savory flavors of the rice cups.
-
Quinoa Salad: This nutty grain salad, with chopped herbs and a citrus dressing, provides a lovely texture and bright flavor to balance your meal.
-
Miso Soup: A warm, umami-rich miso soup acts as a cozy sidekick, enhancing the overall dining experience while adding a nourishing touch.
-
Sushi Rolls: For those sushi lovers, pairing with simple vegetable sushi rolls keeps the meal theme consistent while offering different textures.
Explore different presentations and mix and match these ideas to craft a well-rounded and flavorful spread that will leave your guests asking for seconds!
Crispy Rice Veggie Cups Variations
Feel free to get creative and customize these delightful cups to suit your taste buds!
-
Spicy Kick: Add diced jalapeños or finely chopped serrano peppers to the chickpea mixture for an extra punch of heat. This fiery twist will awaken your senses and keep you coming back for more.
-
Herbed Delight: Mix fresh herbs like cilantro, basil, or parsley into the chickpea filling for added freshness. Herbs not only enhance the flavor but also bring a vibrant touch to your dish.
-
Quinoa Alternative: Swap out sushi rice for cooked quinoa to add a nutty flavor and increased protein content. The nuttiness of quinoa will provide a delightful contrast against the chickpeas.
-
Nutty Crunch: Incorporate chopped almonds or walnuts into the filling for added texture and richness. These nuts introduce a satisfying crunch that makes every bite interesting.
-
Creamy Avocado Dressing: Drizzle a creamy avocado dressing on top instead of plain avocado slices. Blend avocado with lime juice and a bit of water to create a smooth, zesty sauce that adds kid-friendly creaminess.
-
Sweet Potato Base: Instead of rice cups, use mashed sweet potatoes baked in muffin tins for a slightly sweeter take. The natural sweetness of sweet potatoes will create a unique flavor profile.
-
Mediterranean Twist: Replace chickpeas with smoked eggplant or roasted red peppers for a Mediterranean flair. The smoky notes will transport you to sunny terraces, bringing an inviting warmth to each cup.
-
Pesto Infusion: Stir in a spoonful of basil pesto into your chickpea filling for a burst of Italian flavor. This simple addition will impress your guests with its herbaceous richness and bright green color.
How to Store and Freeze Crispy Rice Veggie Cups
Room Temperature: Best enjoyed fresh, but can be kept out for up to 2 hours if needed, covered to keep moisture in.
Fridge: Store leftovers in an airtight container for up to 3 days. Reheat in the oven for crispiness or microwave for convenience.
Freezer: If you want to freeze, place them in a single layer on a baking sheet until solid, then transfer to a freezer-safe bag for up to 2 months.
Reheating: For frozen Crispy Rice Veggie Cups, thaw in the fridge overnight, then reheat in the oven until warmed through for the best texture.
Make Ahead Options
These Crispy Rice Veggie Cups are perfect for meal prep enthusiasts! You can prepare the rice cups up to 24 hours in advance by mixing the sushi rice with rice vinegar, sesame oil, and salt, then pressing them into the muffin tin and refrigerating. Additionally, you can make the chickpea filling and store it in an airtight container for up to 3 days in the fridge. To finish, simply bake the rice cups right before serving, allow them to cool slightly, fill them with the seasoned chickpeas, and top with your chosen veggies. This way, you’ll enjoy the same deliciousness while saving precious time on busy weeknights!
Expert Tips for Crispy Rice Veggie Cups
-
Use Sticky Rice: For best results, ensure you use sushi rice, as its sticky texture is key in forming sturdy rice cups.
-
Don’t Skip the Oil: Lightly oil your muffin tin before pressing in the rice. It helps the cups crisp up and prevents sticking.
-
Watch the Baking Time: Keep an eye on the baking process; once the edges are golden and crisp, it’s time to take them out! Overbaking can lead to dryness.
-
Pack in the Filling: When filling your crispy rice cups, pack the chickpea mixture down gently to ensure every bite is loaded with flavor and nutrition.
-
Customize Toppings: Feel free to mix and match toppings based on what you have. The beauty of these Crispy Rice Veggie Cups is their versatility!
-
Serve Immediately: For the best texture and flavor, serve these cups warm right after filling them. They’re at their crispiest and most delicious!
Crispy Rice Veggie Cups Recipe FAQs
What type of rice should I use for Crispy Rice Veggie Cups?
Absolutely! For the best results, use sushi rice as its sticky texture is crucial for keeping the cups intact while baking. If sushi rice isn’t available, short-grain white rice can be a good alternative, though the texture might slightly differ.
How long can I store leftover Crispy Rice Veggie Cups?
You can store any leftovers in an airtight container in the fridge for up to 3 days. To keep them crispy, reheat them in the oven at 350°F for about 10 minutes. This ensures they regain their lovely crunch!
Can I freeze Crispy Rice Veggie Cups? If so, how?
Yes, you can! First, place the baked rice cups in a single layer on a baking sheet and freeze them until solid, usually around 1 to 2 hours. Once frozen, transfer them to a freezer-safe bag and store them for up to 2 months. When you’re ready to enjoy, thaw in the fridge overnight and reheat in the oven until warmed through.
What should I do if my rice cups aren’t holding their shape?
If your rice cups fall apart, it might be due to insufficient pressing when shaping them in the muffin tin or too little rice in each cavity. Make sure to firmly press the rice mixture into the cavities, creating a sturdy base. Additionally, try adding a bit more vinegar or oil to the mixture, which can help with binding.
Are Crispy Rice Veggie Cups suitable for vegan or gluten-free diets?
Yes, they’re absolutely vegan-friendly! Simply ensure that your soy sauce is labeled gluten-free or use tamari as a gluten-free alternative. You can also customize the filling to suit other dietary preferences, making these a versatile treat for everyone!
Can I make substitutions for the fillings in Crispy Rice Veggie Cups?
Very much! The beauty of these cups lies in their versatility. You can replace chickpeas with black beans, quinoa, or even tofu for a different protein source. Feel free to experiment with whatever vegetables or seasonings you have on hand; it’s all about making it your own!
Crispy Rice Veggie Cups: The Ultimate Vegan Snack Delight
Ingredients
Equipment
Method
- Preheat your oven to 400°F and lightly oil a muffin tin.
- Mix the cooked sushi rice with rice vinegar, 1 teaspoon of sesame oil, and a pinch of salt in a bowl.
- Press the rice mixture firmly into each muffin cavity, shaping it into cups with slightly raised edges.
- Bake the rice cups for 20 to 25 minutes, or until the edges turn golden brown and crispy.
- Combine the chickpeas, soy sauce, remaining 1 teaspoon of sesame oil, maple syrup (if using), rice vinegar or lime juice, garlic powder, green onion, and sesame seeds in a separate bowl.
- Cool the rice cups slightly after baking, then carefully remove them from the muffin tin.
- Fill each rice cup with the seasoned chickpea mixture, pressing down gently to pack them nicely.
- Top with sliced avocado, edamame, cucumber ribbons or grated carrot, and drizzle with sriracha if desired.