There’s a certain joy that comes from combining vibrant colors with delightful flavors, especially when you can create something beautiful without turning on the oven. While browsing my kitchen for inspiration, I found myself captivated by the idea of crafting these Vibrant No-Bake Rainbow Mini Cheesecakes. They’re the perfect treat for any occasion, whether it’s a sunny day picnic or a festive gathering with friends.

Jump to:
- Why will you love <strong>Vibrant No-Bake Rainbow Mini Cheesecakes</strong>?
- <strong>Vibrant No-Bake Rainbow Mini Cheesecake Ingredients</strong>
- How to Make Vibrant No-Bake Rainbow Mini Cheesecakes
- <strong>Vibrant No-Bake Rainbow Mini Cheesecake</strong> Variations
- Expert Tips for Vibrant No-Bake Rainbow Mini Cheesecakes
- What to Serve with <strong>Vibrant No-Bake Rainbow Mini Cheesecakes</strong>?
- Make Ahead Options
- How to Store and Freeze Vibrant No-Bake Rainbow Mini Cheesecakes
- Vibrant No-Bake Rainbow Mini Cheesecakes Recipe FAQs
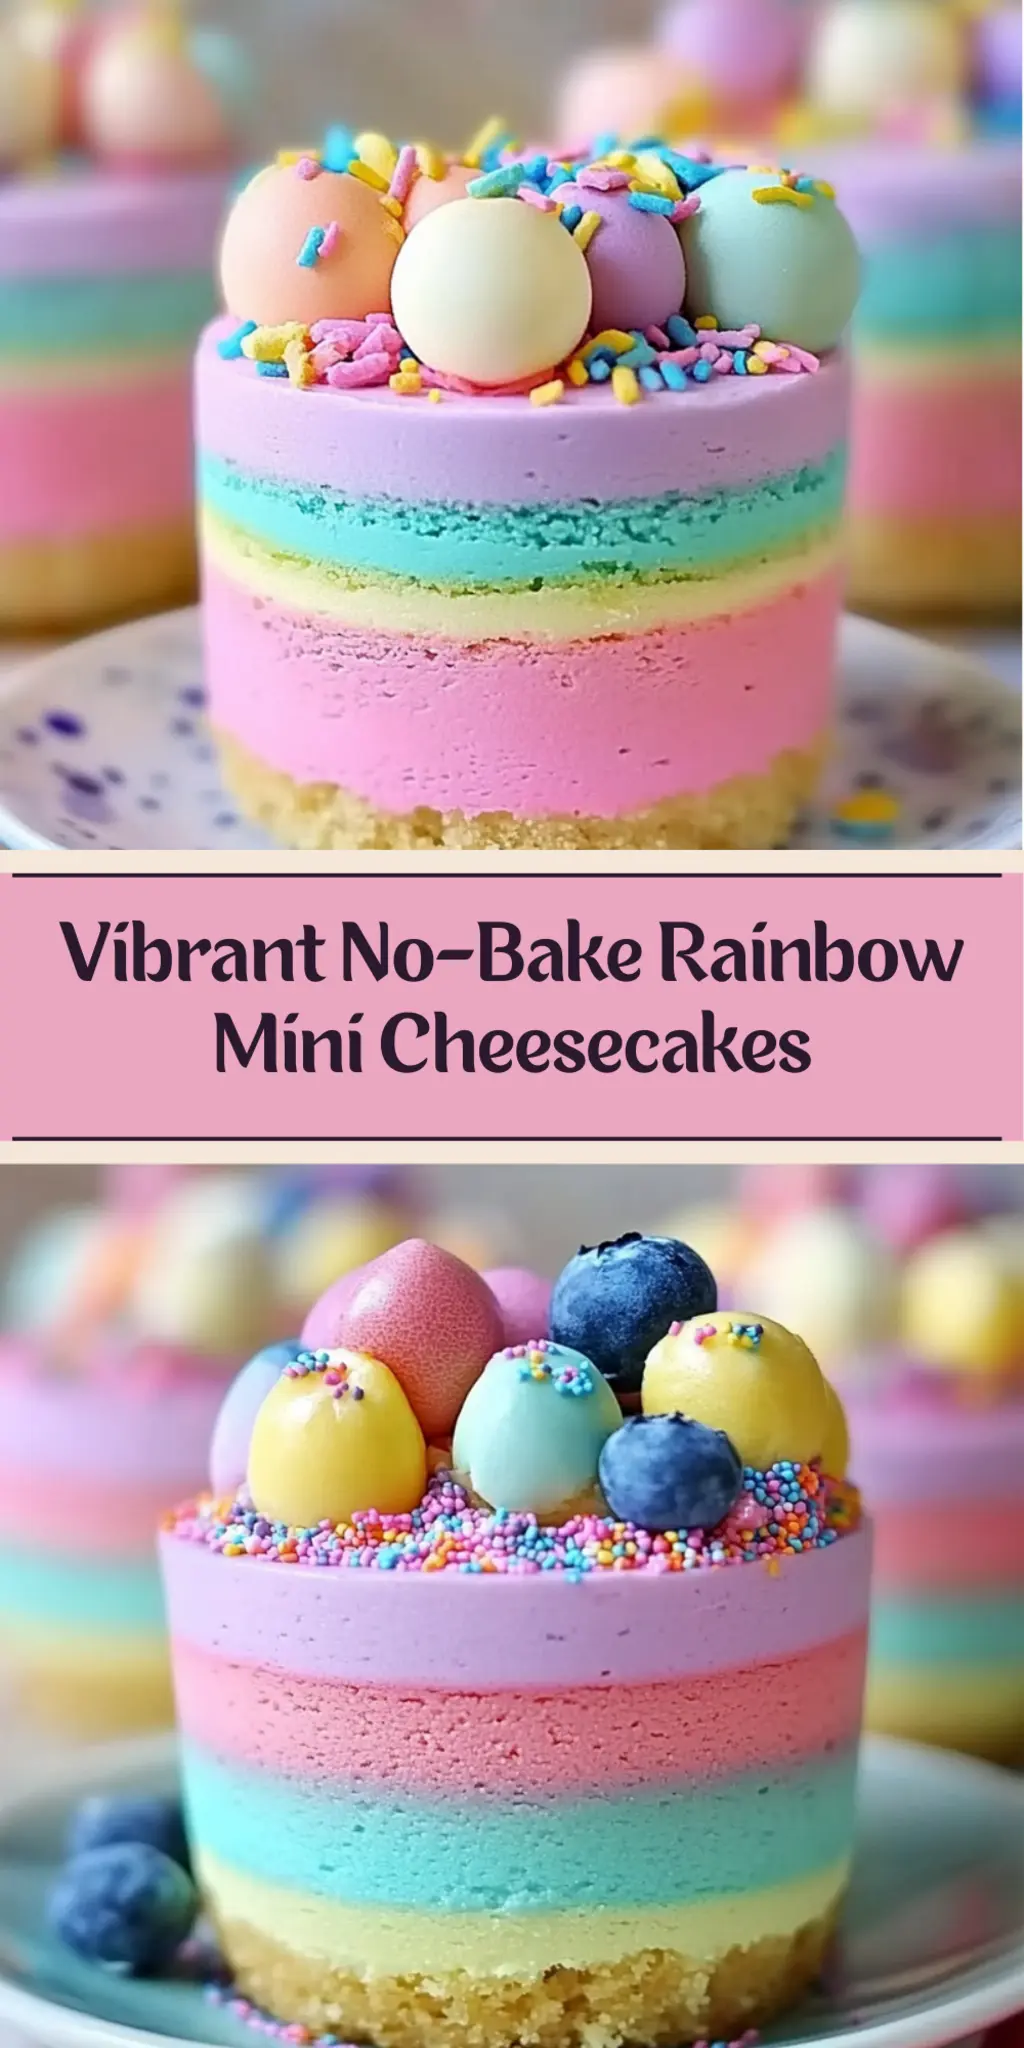
Imagine slicing into one of these mini masterpieces, revealing layers of bright colors that promise a delightful zing with every bite. The rich cream cheese, balanced with just a hint of tangy lemon, pairs perfectly with a crumbly shortbread crust, making them a crowd favorite. Plus, they don’t require any baking, meaning you can whip them up without fuss, leaving more time to enjoy what matters—delicious food and great company.
So roll up your sleeves and dive into this fun recipe that transforms simple ingredients into a stunning dessert that’s sure to impress everyone around your table!
Why will you love Vibrant No-Bake Rainbow Mini Cheesecakes?
Effortless Creativity: You don’t need baking skills to impress.
Colorful Delight: Layers of vibrant hues make every slice a feast for the eyes.
Decadent Flavor: Creamy, rich filling balanced by a subtly sweet crust.
Versatile Treat: Perfect for parties, picnics, or a fun family dessert.
Kid-Friendly Fun: Get the little ones involved in layering colors.
Quick to Make: No oven needed; just freeze and serve for a stress-free dessert!
Vibrant No-Bake Rainbow Mini Cheesecake Ingredients
For the Crust
• Shortbread cookies – a buttery base that adds a delightful crunch.
• Unsalted butter – helps bind the cookie crumbs for a solid crust.
For the Cheesecake Filling
• Cold water – used to bloom the gelatin for perfect consistency.
• Unflavored powdered gelatin – ensures the cheesecake sets beautifully without ruining its taste.
• Full-fat cream cheese – provides rich creaminess; room temperature makes it easy to blend.
• Granulated sugar – sweetens the filling perfectly to balance the tanginess.
• Lemon juice – a touch of acidity that brightens up the flavors.
• Vanilla bean paste – gives a deep, aromatic flavor with delightful specks.
• Pinch of salt – enhances the overall taste.
• Heavy cream – whipped into the mixture, adding a luscious, fluffy texture.
For the Decoration
• Assorted gel food coloring – adds fun and vibrant color layers to your mini cheesecakes.
• Whipped cream – a light and fluffy topping that makes each cheesecake look irresistible.
• Candy eggs and sprinkles – these whimsical toppings bring a festive flair to your dessert.
Get ready to delight in the standout flavors and eye-catching colors of these Vibrant No-Bake Rainbow Mini Cheesecakes!
How to Make Vibrant No-Bake Rainbow Mini Cheesecakes
-
Prepare the Crust: Blitz the shortbread cookies into fine crumbs and mix steadily with melted butter. Firmly press this mixture into a 6-cavity jumbo silicone muffin pan, creating a sturdy base for your cheesecakes.
-
Bloom the Gelatin: Whisk the unflavored powdered gelatin into the cold water and let it sit for about 5 minutes until it blooms, turning into a jelly-like texture.
-
Mix the Filling: Beat the room temperature cream cheese until smooth. Gradually mix in the granulated sugar, lemon juice, vanilla bean paste, and pinch of salt until combined and creamy.
-
Incorporate the Cream: Slowly pour in the heavy cream while mixing on low speed until the cheesecake filling is silky and smooth, with a luscious texture.
-
Add Gelatin: Microwave the bloomed gelatin for 10-15 seconds until it’s warm and liquid. Whisk it into the cheesecake filling immediately to ensure it blends well without clumping.
-
Color the Filling: Divide the cheesecake filling into four bowls and tint each bowl with your choice of gel food coloring, creating vibrant layers.
-
Layer the Cheesecakes: Spoon and layer the colored fillings into the muffin cavities, smoothing each colorful layer with a spoon until all the filling is used.
-
Freeze the Cheesecakes: Place the filled muffin pan in the freezer and let them set for at least 2 hours until they are solid to the touch.
-
Serve: Once frozen, carefully unmold the cheesecakes by pressing from the bottom of the silicone mold. Allow them to defrost in the fridge for a short while, then top with whipped cream, candy eggs, and sprinkles before serving.
Optional: Garnish with extra whipped cream and colorful sprinkles for a stunning display.
Exact quantities are listed in the recipe card below.
Vibrant No-Bake Rainbow Mini Cheesecake Variations
Feel free to let your creativity soar by customizing these delightful mini cheesecakes to suit your taste and dietary preferences!
-
Gluten-Free: Use gluten-free cookies like almond or coconut-based alternatives for the crust, maintaining the delicious crunch.
-
Dairy-Free: Substitute full-fat cream cheese with a vegan cream cheese option and opt for coconut cream instead of heavy cream for a rich texture.
-
Lower-Sugar: Swap granulated sugar with a preferred sugar substitute to reduce sweetness while retaining flavor; just ensure it’s suitable for baking.
-
Fruit-Infused: Blend fresh fruits into the cheesecake filling or layer pureed fruit in between colors for an extra fruity surprise that bursts with flavor.
-
Chocolate Flavor: Add cocoa powder to the cheesecake mixture or use crushed chocolate cookies for the crust for a delightful chocolatey twist.
-
Nutty Crunch: Fold in finely chopped nuts like walnuts or pecans for an added layer of texture, elevating the dessert’s flavor profile.
-
Coffee Kick: Stir in instant coffee granules into a portion of the cheesecake filling for a mocha-inspired delight; it pairs beautifully with the cream cheese.
Let your imagination run wild with these variations, and make these Vibrant No-Bake Rainbow Mini Cheesecakes truly your own!
Expert Tips for Vibrant No-Bake Rainbow Mini Cheesecakes
-
Room Temperature Cream Cheese: Always let your cream cheese come to room temperature for a smoother mixing process. Cold cream cheese can lead to clumps in your filling.
-
Blooming Gelatin: Make sure your gelatin blooms properly in cold water; this is crucial for the cheesecake to set well. Avoid adding it to the mixture too early.
-
Layering Colors: Use a spoon to smooth each layer as you layer your filling. Patience here ensures those vibrant colors truly pop in your Vibrant No-Bake Rainbow Mini Cheesecakes.
-
Freezing Time: Don’t rush the freezing process; allow them to freeze for at least 2 hours to ensure they hold their shape when unmolding.
-
Decoration Creativity: Feel free to get creative with toppings! Use seasonal toppings like fresh fruits or themed decorations to make them extra special and visually appealing.
-
Serve Chilled: These mini cheesecakes taste best when served chilled after defrosting, enhancing their creamy texture and refreshing flavors.
What to Serve with Vibrant No-Bake Rainbow Mini Cheesecakes?
Create a delightful spread that complements these colorful delights for your next gathering.
-
Fresh Berries: Their tartness balances the sweetness of the cheesecake, and the bright colors enhance your dessert presentation.
-
Chocolate Drizzle: A drizzle of rich chocolate sauce adds an indulgent touch and contrasts beautifully with the tangy cheesecake.
-
Citrusy Fruit Salad: A refreshing mix of oranges, kiwis, and strawberries adds vibrant freshness that harmonizes with the cheesecake flavors.
-
Sparkling Lemonade: The zesty, bubbly drink refreshes the palate and contrasts perfectly with the creamy richness of the mini cheesecakes.
-
Mini Cupcakes: Serve a variety of mini cupcakes for a fun dessert display, allowing guests to mix and match flavors for a sweet feast.
-
Vanilla Ice Cream: This classic pairing enhances the dessert’s creaminess, turning your treat into an unforgettable taste experience.
-
Coffee or Tea: A warm beverage balances the sweet flavors, providing a cozy finish to a delightful dessert spread.
Make Ahead Options
These Vibrant No-Bake Rainbow Mini Cheesecakes are perfect for busy home cooks looking to save time! You can prepare the crust and filling up to 24 hours in advance. To do this, press the cookie mixture into the muffin pan and mix the filling, then store both components separately in the refrigerator. This will maintain their quality and freshness. When you’re ready to serve, simply layer the filling and freeze for at least 2 hours. Before serving, let them defrost in the refrigerator for about 30 minutes, then top with whipped cream and festive candies. With these make-ahead strategies, you’ll have a dazzling dessert ready to delight your guests with minimal last-minute effort!
How to Store and Freeze Vibrant No-Bake Rainbow Mini Cheesecakes
Fridge: Keep uneaten cheesecakes in an airtight container in the fridge for up to 3 days. This helps maintain their creamy texture and vibrant colors.
Freezer: Store the mini cheesecakes in a freezer-safe container or wrap individually in plastic wrap. They can last up to 2 months in the freezer.
Thawing: To enjoy, thaw the cheesecakes in the fridge for a couple of hours before serving. This allows them to regain their creamy consistency.
Reheating: There’s no need to reheat these cheesecakes; serve chilled for the best flavor and texture experience.
Vibrant No-Bake Rainbow Mini Cheesecakes Recipe FAQs
How do I choose the right food coloring for this recipe?
When selecting gel food coloring, look for high-quality brands that provide vibrant colors without altering the flavor of your cheesecakes. I recommend using gel over liquid to avoid adding extra moisture. You can also mix colors to create unique shades that will make your mini cheesecakes even more exciting!
How should I store leftover mini cheesecakes?
Absolutely! Store any uneaten cheesecakes in an airtight container in the fridge for up to 3 days. If you want to keep them longer, consider freezing them. They maintain their flavor and texture beautifully, ensuring you can enjoy them later!
Can I freeze these no-bake cheesecakes?
Yes! For freezing, store your mini cheesecakes in a freezer-safe container or wrap them individually in plastic wrap. They can last up to 2 months in the freezer. When you’re ready to enjoy them, simply thaw in the fridge for a couple of hours until they regain their creamy consistency.
Why is my filling not setting properly?
If your filling isn’t setting, the gelatin may not have bloomed correctly. Make sure you properly dissolve the gelatin in cold water and give it a good 5 minutes to set before adding it to the cream cheese mixture. Also, ensure that your filling is mixed well before layering it into the molds.
Are these mini cheesecakes suitable for dietary restrictions?
Very! These Vibrant No-Bake Rainbow Mini Cheesecakes can be adjusted for various dietary preferences. You can opt for gluten-free cookies for the crust, and choose dairy-free cream cheese and heavy cream alternatives. Always check labels for allergens to ensure everyone’s safety, especially if serving guests with specific dietary needs.

Vibrant No-Bake Rainbow Mini Cheesecakes: Easy Colorful Delights
Ingredients
Equipment
Method
- Blitz the shortbread cookies into fine crumbs and mix steadily with melted butter. Firmly press this mixture into a 6-cavity jumbo silicone muffin pan.
- Whisk the unflavored powdered gelatin into the cold water and let it sit for about 5 minutes until it blooms.
- Beat the room temperature cream cheese until smooth. Gradually mix in the granulated sugar, lemon juice, vanilla bean paste, and pinch of salt.
- Slowly pour in the heavy cream while mixing on low speed until the cheesecake filling is silky and smooth.
- Microwave the bloomed gelatin for 10-15 seconds until it’s warm and liquid, then whisk it into the cheesecake filling immediately.
- Divide the cheesecake filling into four bowls and tint each bowl with your choice of gel food coloring.
- Spoon and layer the colored fillings into the muffin cavities, smoothing each layer with a spoon.
- Place the filled muffin pan in the freezer and let them set for at least 2 hours.
- Once frozen, carefully unmold the cheesecakes by pressing from the bottom of the silicone mold, and top with whipped cream, candy eggs, and sprinkles before serving.